

Before you begin
You need:- A Google Cloud project, or permission to create one.
- The public address of your Onyx deployment, such as
https://onyx.example.com. Google sends the sign-in back to that address, so it must match exactly. - The Google account that will authorize Onyx. Everything the connector indexes is what this account can open.
Configure Google Cloud
1
Create or pick a project
In the Google Cloud console, create a project,
or select an existing one.
2
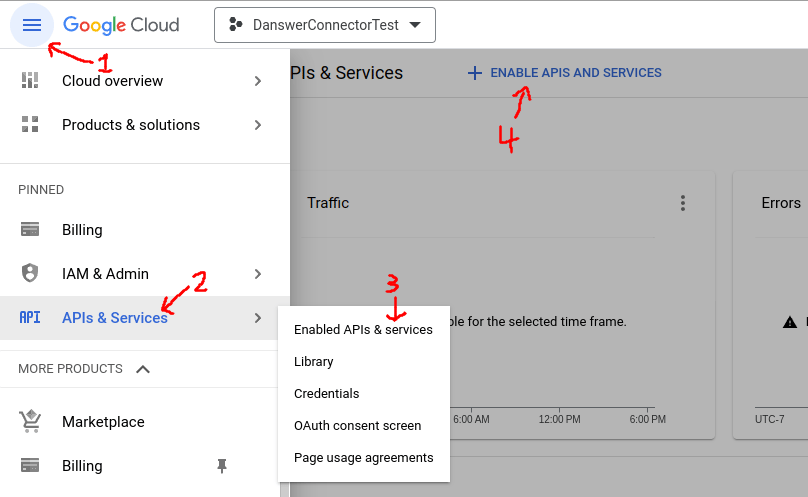
3
Set up the consent screen
Open Google Auth Platform → Branding. If the project has no consent screen yet, select Get started.
- App name:
Onyx, or any name your users will recognize. - User support email: an address at your organization.
- Audience: Internal if the project belongs to a Google Workspace and only its users will authorize Onyx. External otherwise, including for a personal Google account.
- Contact information: an address at your organization.
4
Add the scopes
Open Google Auth Platform → Data Access and select Add or remove scopes. Add these four,
then select Update and Save:The two Drive scopes are marked sensitive, and the two Admin SDK scopes are restricted.
With an Internal audience Google applies no review. With External, see the next step.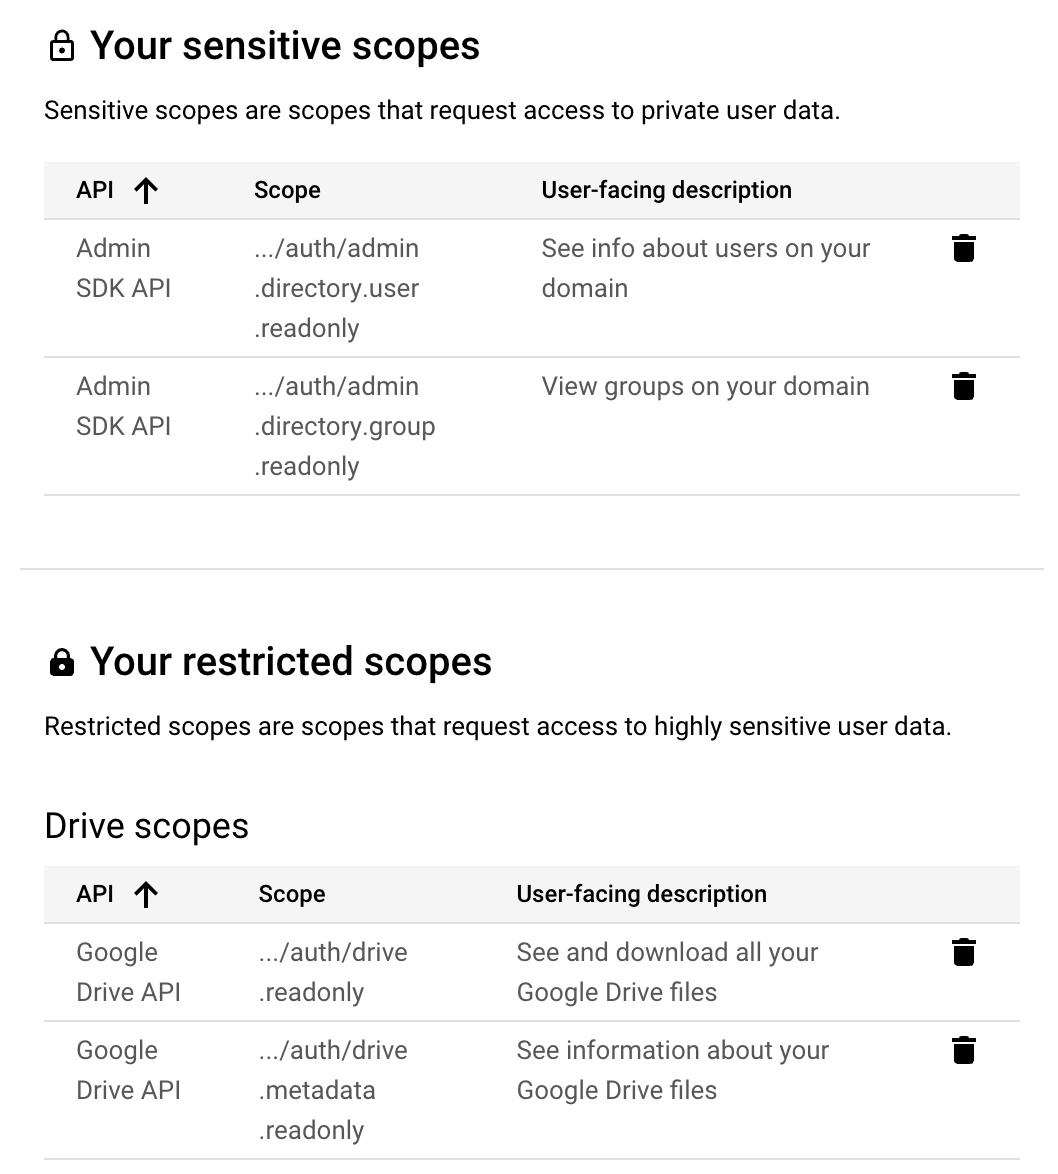
5
Add test users, for an External audience
An External app starts in testing, and only listed test users can authorize it.
Open Google Auth Platform → Audience,
and under Test users select Add users and add the Google account that will authorize Onyx.Testing mode is enough for Onyx. Google expires a test user’s authorization after seven days, though,
so the account has to reauthorize the credential weekly. To avoid that, publish the app under Publishing status.
With restricted scopes, publishing sends the app to Google for verification,
so an Internal audience is the easier path for a Workspace.
6
Create the OAuth client
Open Google Auth Platform → Clients and select Create client.On Onyx Cloud the address is 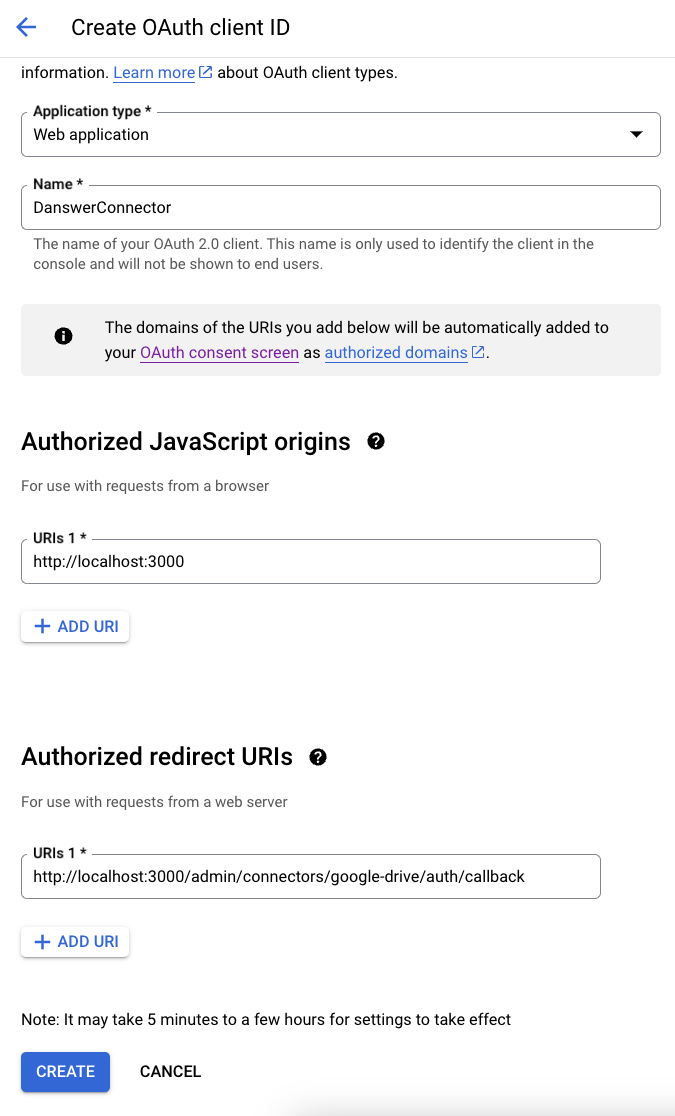
- Application type: Web application.
- Name:
Onyx, or anything you like. - Authorized redirect URIs: select Add URI and enter your Onyx address followed by
/admin/connectors/google-drive/auth/callback:
https://cloud.onyx.app. For a local deployment it is http://localhost:3000.
The scheme, host, and port must match your deployment exactly, or Google rejects the sign-in.7
Download the client JSON
Select Create. In the dialog that follows, select Download JSON.
The same download is available later from the client’s row under Clients.
This file is the OAuth app you upload to Onyx.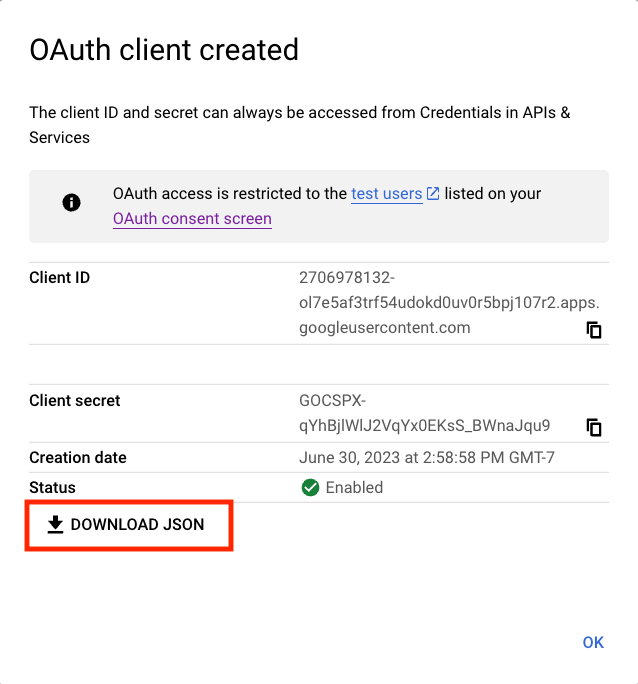
Create the credential in Onyx
1
Open the Google Drive connector
In Onyx, go to Admin Panel → Add Connector and select Google Drive, then select Create New.
2
Upload the OAuth app
Under Option 1: OAuth app, upload or paste the client JSON you downloaded.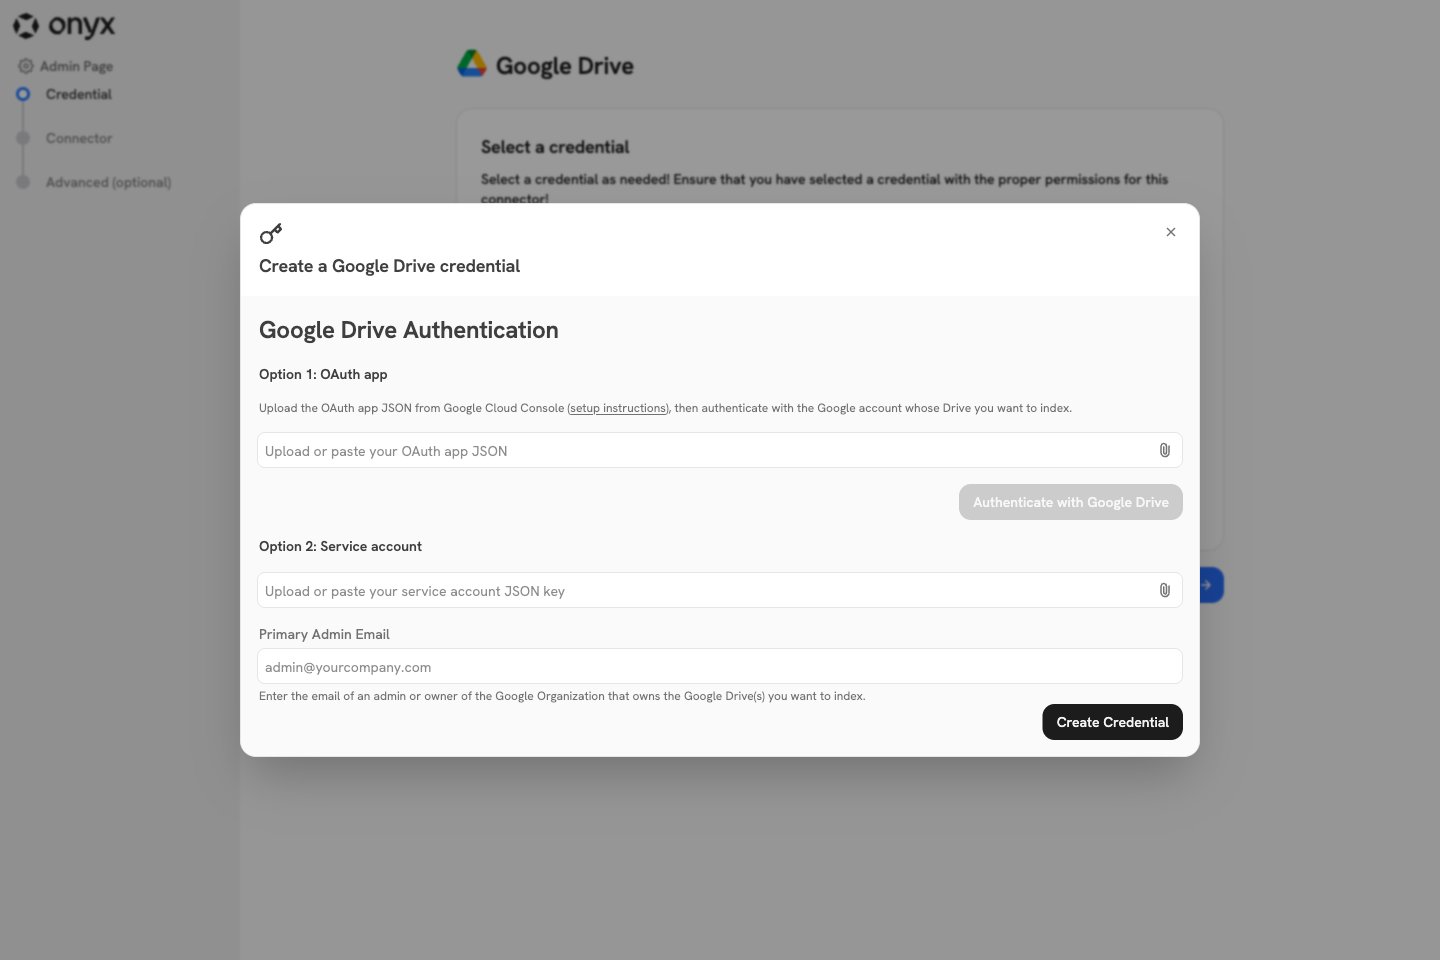
3
Sign in to Google
Select Authenticate with Google Drive and sign in as the account whose Drive Onyx should index.
Approve every permission Google lists; Onyx needs all four. Google returns you to Onyx,
which shows Authentication Complete and creates the credential.
4
Continue to the connector
Select the new credential and select Continue.
Then follow Configure the connector in
Onyx.
Permission sync with an OAuth credential
If you use this credential with Auto Sync Permissions, the account that signed in must be a Workspace administrator with these privileges, set under Account → Admin roles in the Google Admin console:- Admin console privileges → Services → Drive and Docs → Settings
- Admin API privileges → Users → Read
- Admin API privileges → Groups → Read
- Admin API privileges → Organization Units → Read